Solderless Breadboards For Building DIY Electronics Projects
Building electronic circuits is easy with solderless breadboards
When I started out in electronics I would build prototype circuits by hammering nails into a block of wood then soldering wires and components between the nails. I started to do it this way soon after I grew out of the engineering kit that my parents got me for Christmas. No one could have been more surprised than I was when I got my first job in a TV factory and I found that building circuits on a bed of nails breadboard was common industry practice. To this day my mother makes a point of telling everyone how the floor of my bedroom was permanently covered with a carpet of bits of wire and solder blobs from my diy hobby electronics table. How embarrassing is that when you are a teenager? If solderless breadboards had been available back then a lot of the mess that I generated could have been avoided. Especially the solder blobs in the carpet which are not easy to vacuum up and don't do the carpet much good either.
Cleaner hobby electronicsToday things are much simpler. Solderless breadboards mean that you have do less component lead cutting and of course, no soldering at all. You don't need to invest in a soldering iron straight away and you can even reuse your components to build other circuits if you want to.But which solderless breadboard should you go for? They come in all different shapes and sizes and if you have never used one before it can be difficult to to know which one is best.
Which board to chooseWell believe it or not I had the same problem recently. Despite working with and building electronics circuits all my life I had never actually used one of these solderless boards. When I was starting out I soldered up circuits on a bed of nails and later, when these solderless boards became available, the circuits that I built were either so simple that I could just solder them up on copper strip boards or they were so complicated that the only practical way to build a prototype was to create a printed circuit board.So I decided that I would treat myself to one. I researched all the boards on Amazon and settled on an 830 tie-point, 4 power rail solderless breadboard. It seems to be big enough to build a decent circuit and small enough not to get in the way on the kitchen table too much. Click here to order one for yourself right now. Don't worry if you outgrow this particular board because you can always expand your circuits by simply buying more breadboards later.
How to plan your circuit build
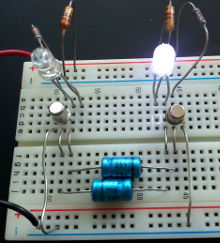
My Solderless Breadboard Building circuits this way is easy. Once you have figured out where the components should go you just slide the leads into the holes. No problem at all. |
| Now subscribe to our newsletter and don't miss a thing |
|
|


Comments
No comments yet.Add Comment