|
How to flash a 3.2v white LED from an Arduino Running at 2v
LEDs are really handy little components that get used in practically every project. Well there are almost always some LEDs in my projects so it comes as a bit of a shock when you want to use one in a low voltage design and realize that LEDs need a higher voltage to illuminate than the voltage you are going to use to power the device.
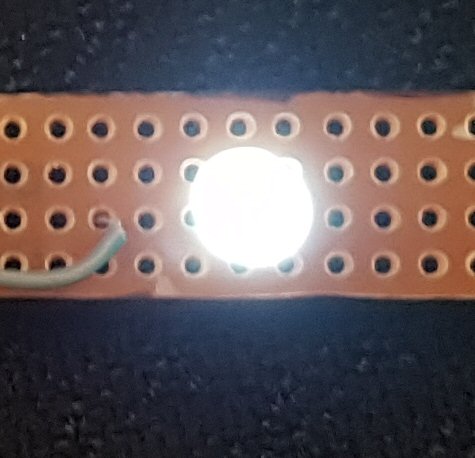
I wanted to flash LEDs from an Arduino microcontroller in a low power battery operated gadget. It had to be as small and light as possible so I wanted to use a 3V button cell to power it and get a few months of operation out of it by making use of the power down sleep modes. Getting the most out of the battery means making sure that the electronics will work when the battery voltage gets low but I needed to boost the output voltage to drive the LEDs.
This is a particular problem when you want to use a white LED because they need the highest voltage of all visible LEDs. An Arduino microcontroller will work with a suply voltage as low as 1.8v but a typical white LED needs around 3.1v before it starts to turn on.
To a lesser extent single colour LEDs have the same problem. A blue or green LED might need 2.8v and red and yellow LEDs turn on at approximately 1.8v. If you are running your circuit with a battery and you expect it to work right down to 1.8v then you are going to need to get more volts from somewhere.
A simple voltage multiplier
Here is the solution I came up with. It gives your IO a little voltage boost and will drive a white LED from a supply voltage of less than 2v. It should illuminate the other colour LEDs down to 1.8v.
So what is happening in this circuit? I've assumed that the microcontroller is running on a Vcc of 2V which is not enough to illuminate white LED D2. At least 3V is required to make it glow. To boost the voltage on the LED a square wave is generated in the microcontroller by software and applied to the electrolytic capacitor C1. The diode D1 clamps the opposite side of the capacitor to approximately 1.3V which is 0.7V below the 2V Vcc. Below 1.3V D1 starts to conduct and charge the capacitor.
The resistor R1 limits the current flowing through the LED and prevents damage when running on voltages higher than 3.7V.
When the left hand side of the capacitor transitions from 0v - 2V the right hand side should show a 2V transition but starting at 1.3V and rising to 3.3V. I measured 3.1V on my prototype which is a little short of what I expected but is probably explained by the square wave from the microcontroller being not quite 2V and the LED starting to conduct which discharges the capacitor slightly.
3.1V is enough to illuminate the high efficiency LEDs that I used. I believe that the same would be true of almost any white LED and mine are not special or expensive.
| 


Comments (1)
Add Comment