


Transistor Touch Switch Simple Science Project construction
Transistor Touch Switch Simple Science Project construction
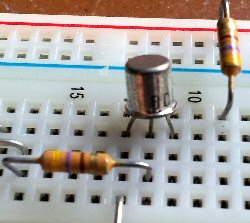
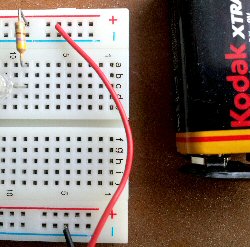
When you place your finger on the two wires that make up the touch sensor you should see the LED glow. This is due to the tiny current passing through your finger being amplified by the transistor to deliver a larger current into the LED. See what happens when you press harder on the touch wires or when you dampen your finger before touching. If you see the LED glow brighter then it's because you are conducting more current into the base of the transistor. You have just built a very simple touch switch that uses a single transistor. We could make the circuit more sensitive by adding another transistor to increase the current gain or amplification. That is for another day however.
| ||||||||||||||||||||
| Now subscribe to our newsletter and don't miss a thing | ||||||||||||||||||||
|
|


You should assume that there is an affiliate relationship and/or another material connection to the providers of goods and services linked to on this page and that we may be compensated when you purchase from a provider. Homediyelectronics.com is a participant in the Amazon Services LLC Associates Program and the Amazon EU Associates Programme, an affiliate advertising program designed to provide a means for sites to earn advertising fees by advertising and linking to amazon.com and amazon.co.uk.
Copyright © 2013 - 2026 homediyelectronics.com |
Legal |
Contact me |
Feed |
Google |
Site Map
Comments (10)
Add Comment