Click here for a free subscription to "HDE" our site newsletter.

Christmas Lights Icicle Button Battery Board

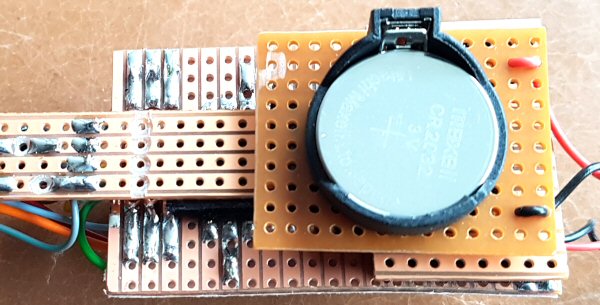
Battery board assembled onto the Icicle decoration

Adding the power source

A 3v CR2032 Button Cell is used to power the icicle decoration. It is shown mounted in a battery case which is soldered to a piece of stripboard which is Velcro'd to the bottom of the LED strip.

Please remember that this is my first prototype of this project so I might have ended up with more boards than I needed. If I ever build another I will probably put everything on the same board. But this one works for now.

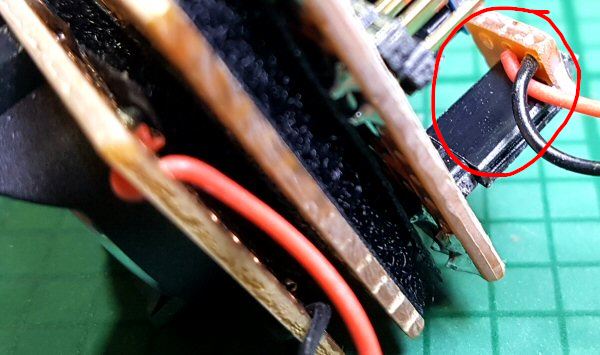
I did'nt make a layout for the battery board because it is so simple. Solder the 3v CR2032 battery holder to the stripboard making sure that the tracks are seperated then solder red and black wires to positive and negative respectively. Mount a two-pin header on a small piece of stripboard and solder the wires to it as shown to the right. The header can then be plugged into the pins marked 'Vcc' and 'Gnd' on the Pro-Mini carrier board.

Pop in a CR2032 button cell and the icicle is ready to go. Well it will be when you have programmed a suitable sketch into it.


Now subscribe to our newsletter and don't miss a thing


Comments

No comments yet.

Add Comment

* Required information
(will not be published)
 
Bold Italic Underline Strike Superscript Subscript Code PHP Code Quote Insert line Bullet list Numeric list Link Email Image Video
 
Smile Sad Huh Laugh Mad Tongue Crying Grin Wink Scared Cool Sleep Blush Unsure Shocked
Captcha
Refresh
 
Enter code:
 
Notify me of new comments via email.
 
Remember my form details on this computer.
 
I have read and understand the privacy policy. *
 
I have read and agree to the terms and conditions. *
 
Click here for a free subscription to "HDE" our site newsletter.